ROOF PIPE SUPPORTS

sub-bg-process-2.jpg

PS-1-2

for pipe sizes 2-1/2″ and larger

Product information

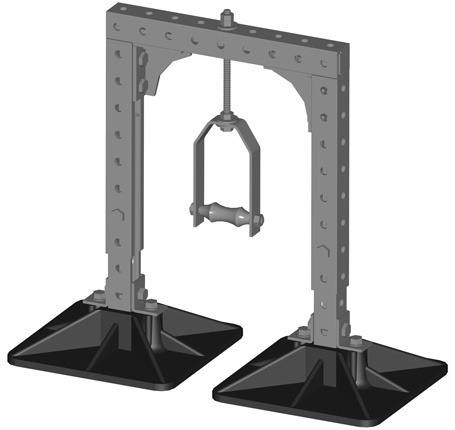
The PS 1-2 model is designed to support a single gas pipe at most any specified height above the roof surface. The frame supports the pipe from above using a hanger.

REQUEST PRICING
PHP System/Design

PS-1-2 Installation

  1. Layout isolation pads, (provided by contractor), according to the design and layout.
  2. Place bases on isolation pads.
  3. Insert the legs of pipe support into bases, (attach with 2-1/2” bolt and 1/2” nut).
  4. Space out pipe supports according to specifications. This should be done before any pipe is supported.
  5. IF BRACING IS REQUIRED, attach horizontal bracing to legs of pipe supports, (approximately 3/4” of the way up the height of the support), with 3” bolt and 1/2” nut.
    NOTE: If double or triple bracing is required, designated locations will be marked on the support legs.
  6. Remove bottom half of clevis hanger.
  7. Insert insulation protection shield between bottom half of the hanger and insulated pipe.
  8. Reattach bottom half of hanger to top half of the hanger.
  9. Adjust height of hanger, so hanger is supporting piping. Adjust height of hanger by turning nut at top of allthread, (clockwise to raise, counter-clockwise to lower).
    NOTE: Over adjusting will cause excess weight on support.
  10. Repeat step 9 on each support in the system, making sure the pipe and supports are level, both vertically and horizontally, and proper spacing is maintained per design specifications.
  11. Check that the weight of the pipe is distributed evenly throughout the system.
PS-1-2 Installation